Enhancing Graphic Organizers and Handouts with Basic Photoshop Tools
Created by Robert Dunlop
Release yourself from the confines of using word processing programs to create your handouts and graphic organizers. By learning five of the basic Photoshop tools, you will be able to quickly blend together text boxes and digital images into a final product that looks professional and engaging. Not only will these handouts look better, you will be able to create them faster and with less frustration than if you were to use programs such as Word or Open Office. This is just a glimpse into the power of Photoshop and its usefulness in the classroom.
Why use Photoshop?
By having the ability to create and manipulate layers, everything gets easier. You will be able to do what you want to do, how you want to do it, quicker than ever before. To start, creating and adjusting text boxes is quick and easy. Within seconds, you can create multiple areas on a page where students can record their ideas and express their understanding. Now you are ready to insert digital images that are void of a background and ready to give you the look you have always tried to achieve. Finally, select a cool font and add text to your masterpiece. If there is something you need to adjust it is easy. Just select that layer, make the necessary changes and you are done. Faster than ever before.
What tools will I need to know how to use?
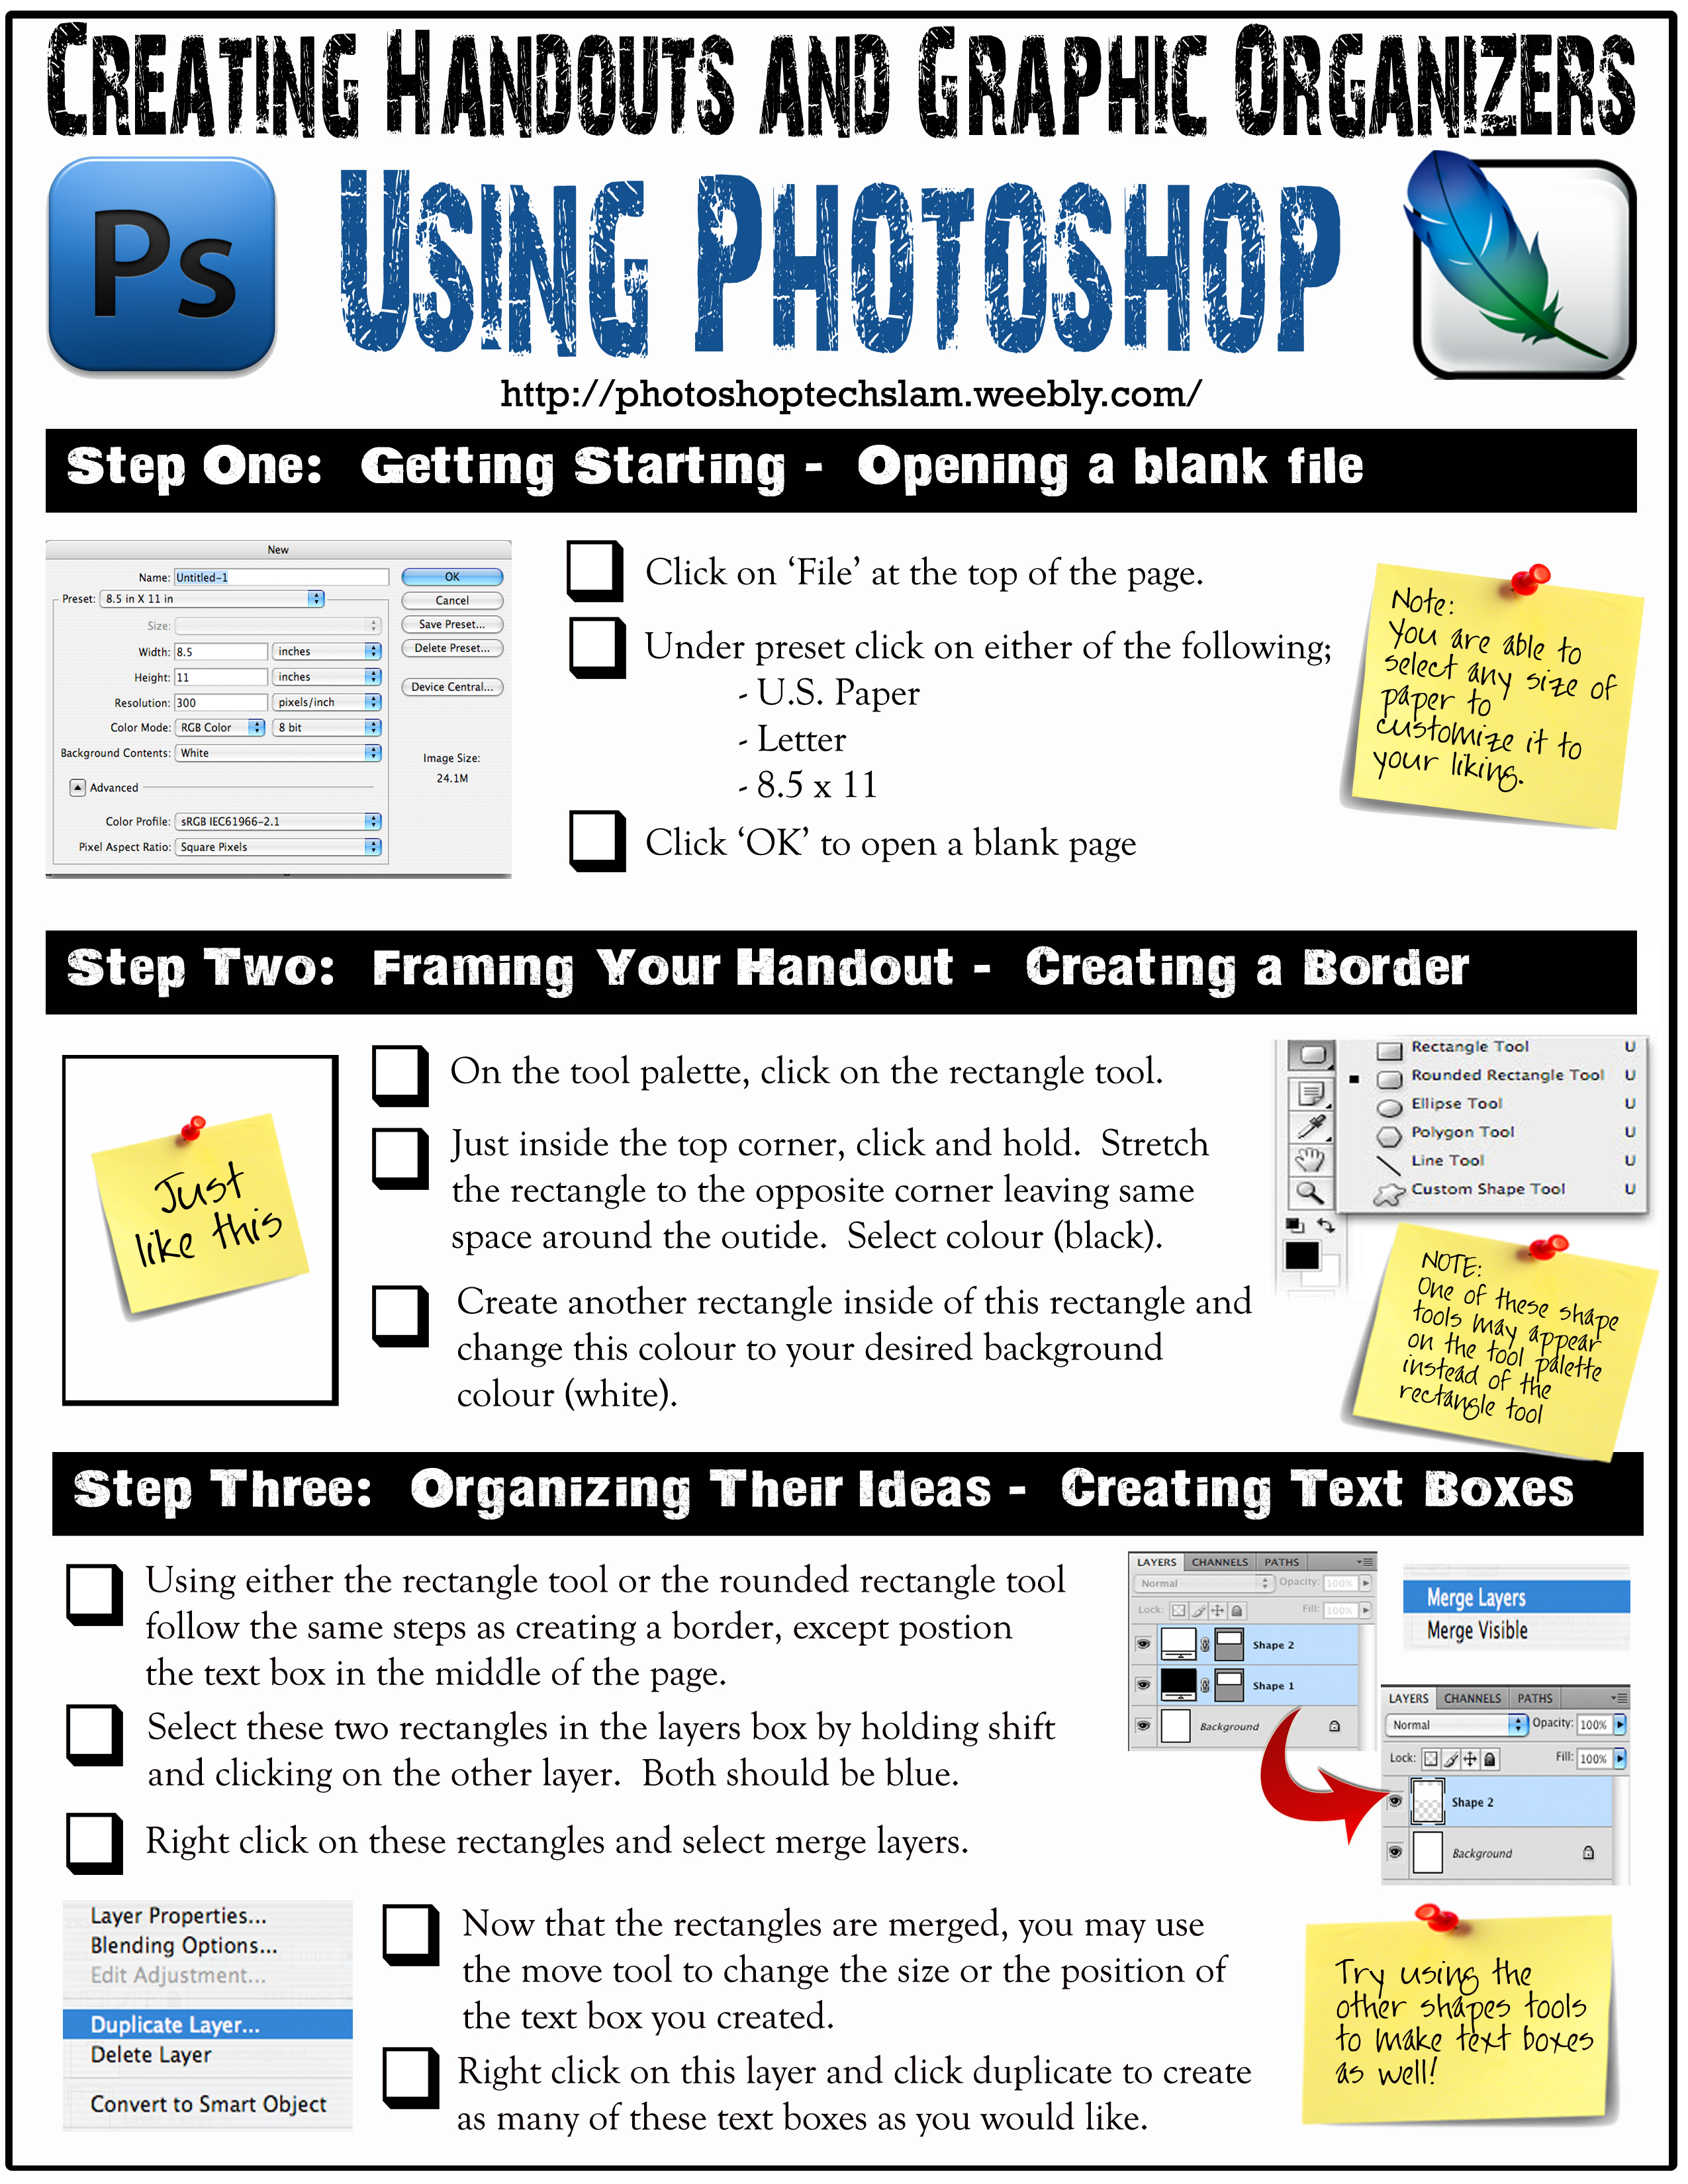
You will only need to learn the following five tools to create handouts like the one demonstrated below.
- Move Tool
- Magic Eraser Tool
- Rectangle Tool
- Text Tool
- Zoom Tool
Five Easy Steps to Help You Create A Handout
Click on the following downloads to see how you can create amazing handouts and graphic organizers in only five steps. Or view the following video tutorials to guide you through the entire process of making a handout or graphic organizer in Photoshop.
| Creating Handouts and Graphic Organizers in Photoshop (Part One) |
| Creating Handouts and Graphic Organizers in Photoshop (Part Two) |
Video Tutorial #1: Getting Started in Photoshop
This video will show you how to open a new document in Photoshop as well as how to create a border and text boxes.
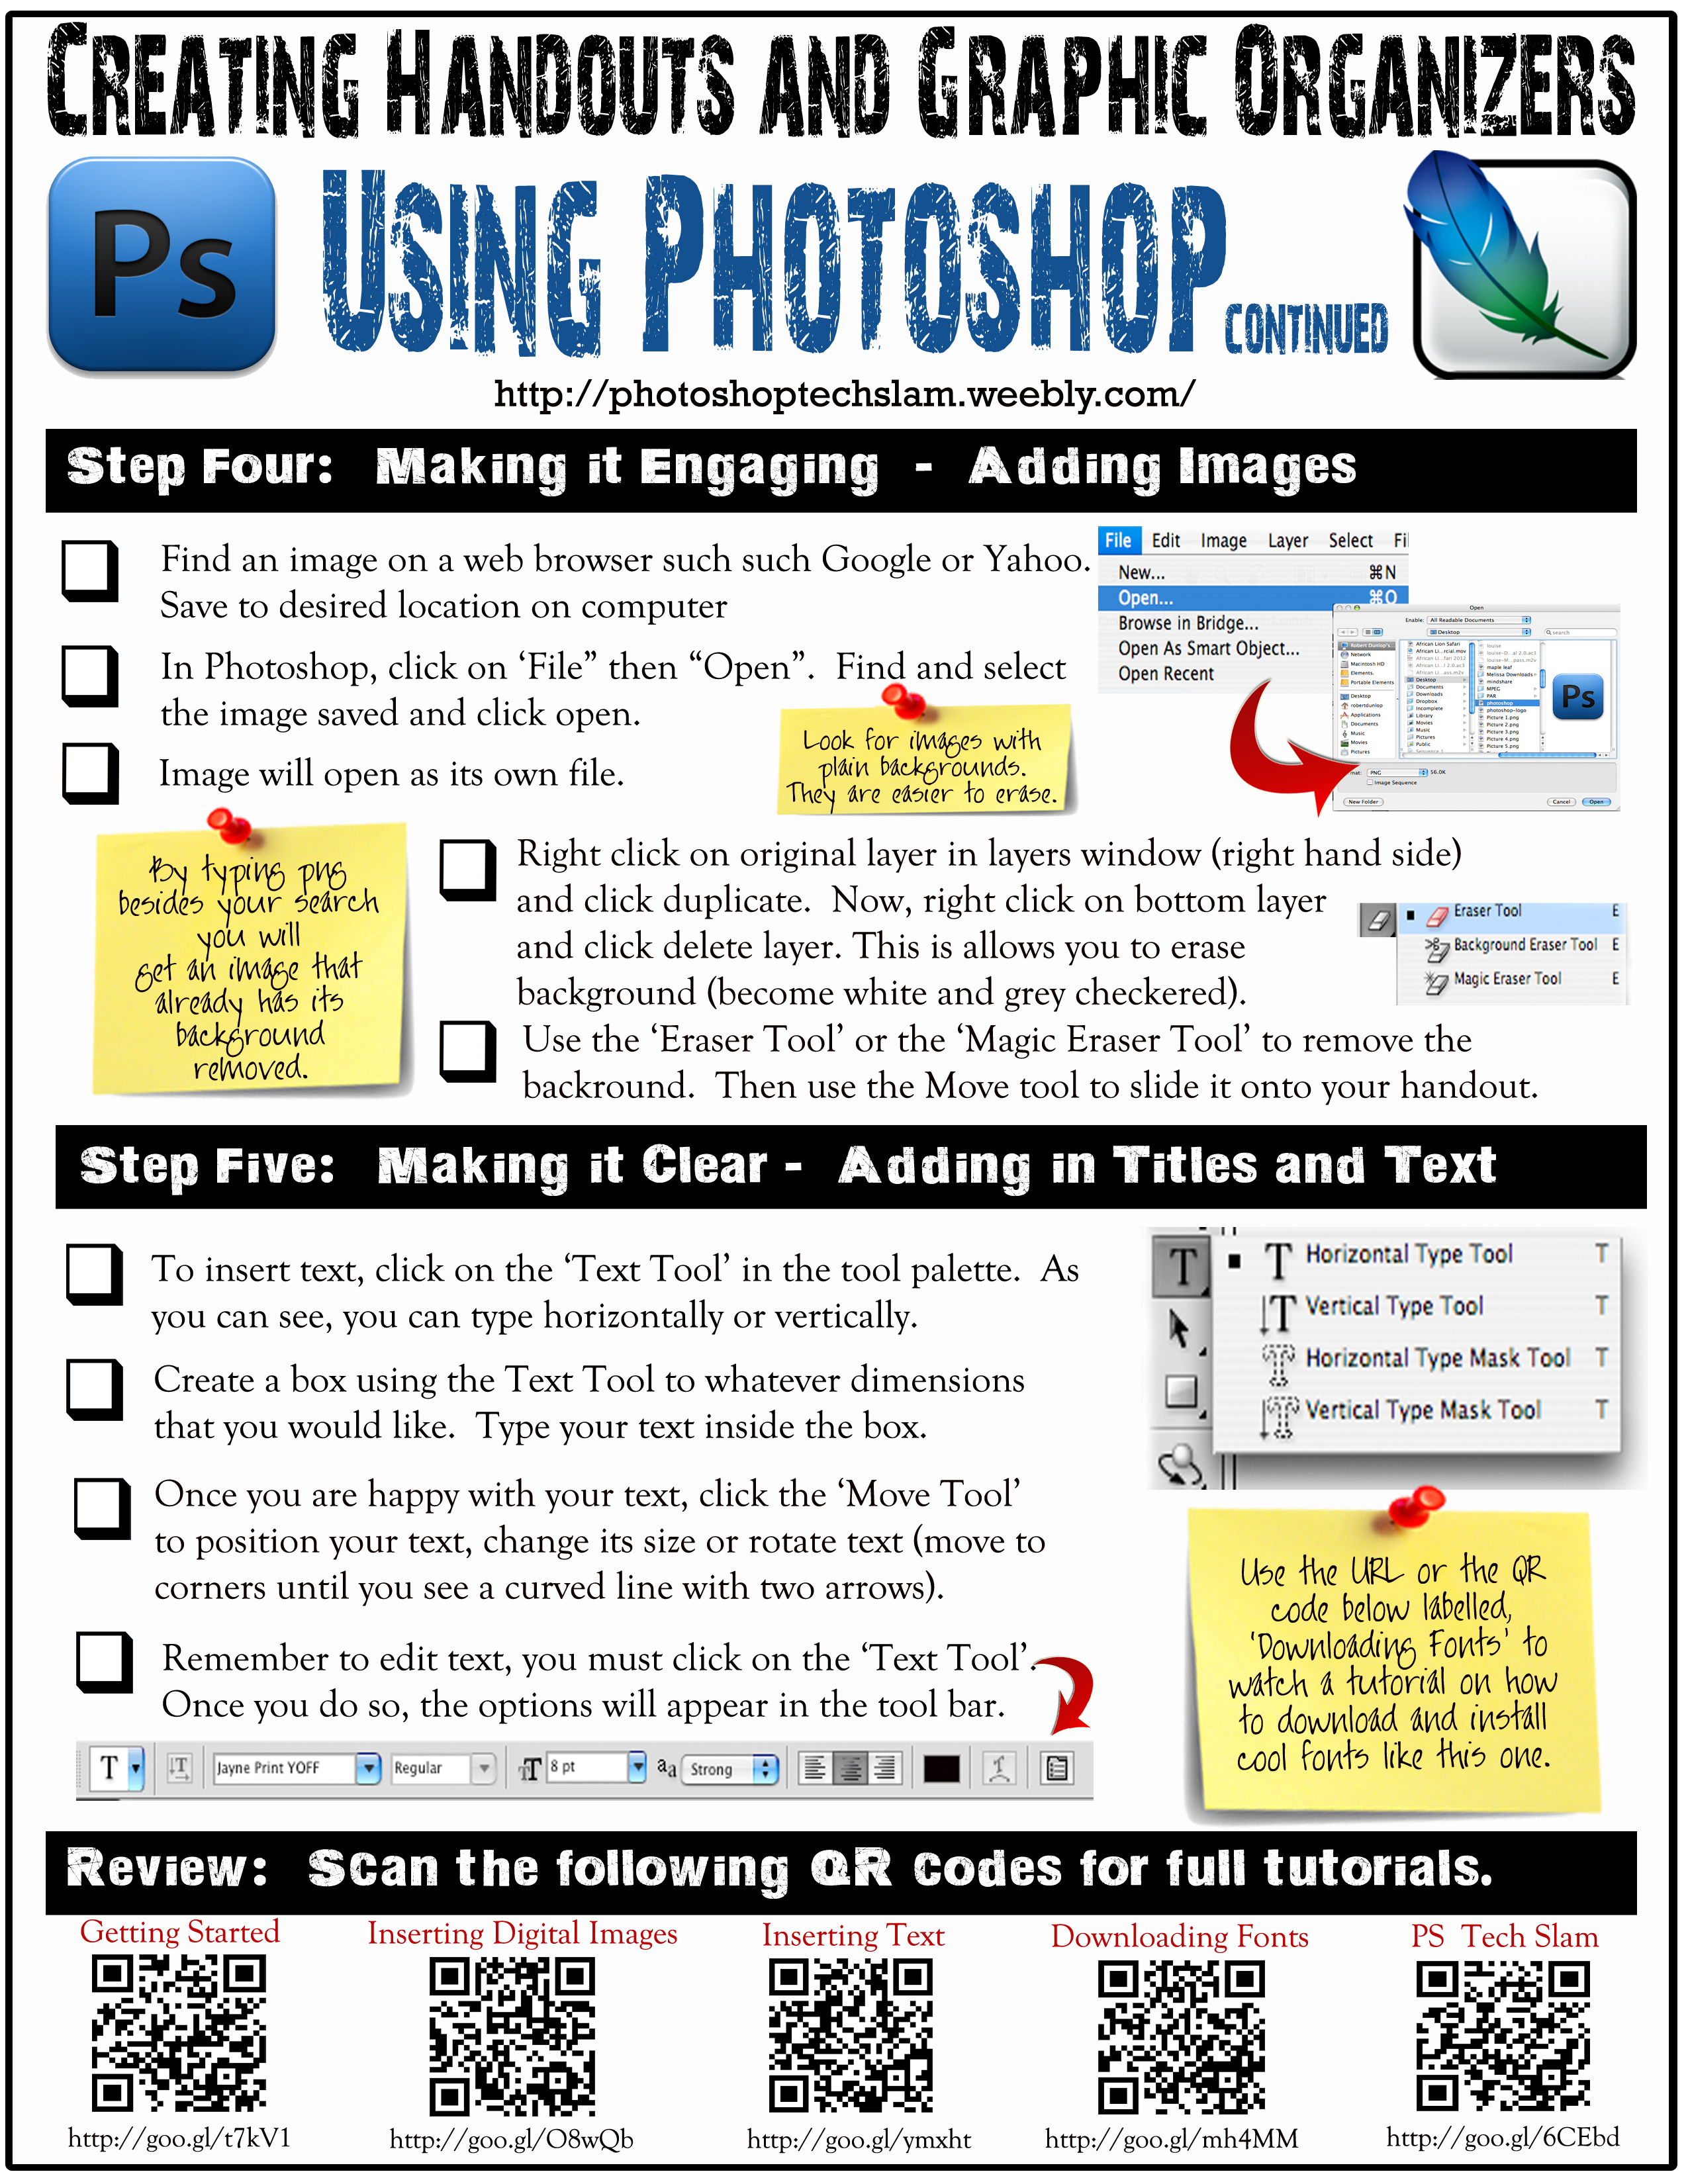
Video Tutorial #2: Adding Digital Images to Handouts
This video will show you how to open images in Photoshop. As well, you will learn how to remove the background from an image using the Magic Eraser Tool.
Click here to learn how to use the Polygon Lasso Tool to help you crop images with blended backgrounds.
Click here to learn how to use the Magnetic Lasso Tool to help you crop images even quicker.
Click here to learn how to use the Magnetic Lasso Tool to help you crop images even quicker.
Video Tutorial #3: Adding Text to Handouts
This video will show you how to add and position text in photoshop. As well, below you will see a link on how to install great fonts on your computer.
Click below to see handouts and graphic organizers created using Photoshop.
The Terry Fox Handouts above and more can be found on the official Terry Fox Website.
Examples of Student Work Created Using Photoshop
Once you know the basics of Photoshop, you will soon be able to teach it to your students. Within a very little amount of time, students will be able to create amazing pieces of work like the ones showcased below. This is all student work that was created within a month of learning this program.
The assignments are as followed: - Recipes used to demonstrate an understanding of expository text features
- Movie posters to demonstrate understanding of implied and overt messages
- Class logos to demonstrate media skills and to develop class unity
- Career Reports to demonstrate organization of research and data management
- Creating and answering Algebraic problems five different ways (pictures, graphs, tables,
equations, numbers)
